Highpath Engineering – Specialist in Cycle Adaptations
Highpath Engineering are UK based precision engineers.
We specialise in products and services that modify and adapt cycle cranks. If you find that standard cycle parts don’t meet your needs, turn to us first for a long lasting solution. If you need pedal thread repairs or tandem crank conversions, our service is second to none.
Problems we can solve …..
Do you have
- stiff or restricted hip, knee or ankle joints
- leg length discrepancies
- prosthetic limbs and implants
- arthritis
- nerve damage
- muscle wastage
- or sports injuries?
We have supplied Pulse Crank Shorteners and Swing Cranks to cyclists worldwide to overcome these problems, and enabled them to return to comfortable and enjoyable cycling.
Perhaps you suffer from
- heel strike
- knee discomfort?
Our Pedal Extenders can reduce or eliminate both.
Are you are interested in shorter cranks? Riders who have fitted our Crank Shorteners, or have had cranks shortened, have reported
- greater endurance
- increased power
- increased comfort
Have you stripped or damaged a pedal thread? Don’t throw the crank out – have it repaired by us.
Are you building a tandem? We will convert cranks to your specification.
All our products can be supplied free of VAT – see our news page
Highpath Engineering Current Products
Swing Cranks
A unique and adaptable CNC produced product that allows anyone with a leg impairment to cycle again in comfort.
The Swing Crank allows wide choice of movement circles to aid a cyclist’s pedalling motion. Many cyclists who thought they would never ride a bike again due to knee and hip problems have used Pulse Swing Cranks to return to cycling. They are supplied with one of our Crank Shorteners, or can be ordered alone for use with a shortened crank.
They are available in Standard and 3-hole Long versions for bicycles, and Standard and 4-hole Long versions for recumbents, trikes and exercise bikes.
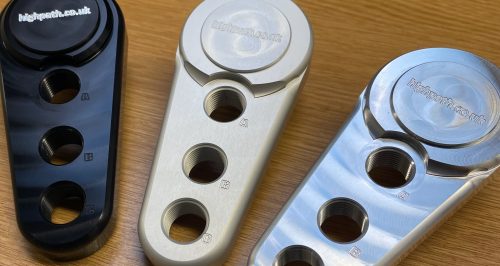
Crank Shorteners
Many cyclists are discovering the advantages of shorter cranks. Our Pulse Crank Shorteners are a unique, flexible ‘bolt on’ solution offering a choice of new pedal postions. They are made from heat treated aircraft grade aluminium, and available in two sizes and a variety of finishes.
Each shortener is supplied with a full fitting kit that is designed for maximum rigidity in use.
We can also permanently shorten cranks to a specified length.
Pedal Extenders
Designed to increase your foot spacing while cycling to individual needs.
Manufactured from sturdy stainless steel, these easy to fit spacers allow the pedals to be moved outward by 23mm – particularly useful for those whose feet tend to point outward causing ‘heel strike’ on the the crank.
Additional Services
Cycle Crank Shortening
Your crank length can be permanently reduced (subject to design) . Using purpose built jigs to ensure accuracy, we can shorten your aluminium cranks to your requirements on a CNC milling machine. We have a built a strong worldwide reputation for the quality of this work.
Crank Repairs and Modifications
We can reform and repair damaged or worn crank pedal threads. We will also reverse pedal threads for tandem crossover drives.
Carbon cranks with damaged pedal threads can often be restored at a fraction of the cost of a new crank.
We can supply at zero-rate VAT for some customers – Click for details
September 2025 – US orders
Due to the withdrawal by US Customs of the small value items exemption, a 10% tarriff is now being added to all orders sent to the US from the UK. As a result, all orders paid in US dollars will attract a 10% levy.
June/July 2025 stock update.
Good news – pedal extenders are back in stock. We will be raising prices in July, so get your orders in!
Clear anodised swing cranks are also back in stock
We have new items on our Sale Items page.
Happy Cycling!
Patrick
January 2023
Happy New Year! Quite a whirlwind of work for this year, bringing our products to an ever wider audience. I’m pleased to say that we finally caught up with our backlog of orders and custom work, so we are starting 2023 with good stock levels. We are closed between 11th and 30th January this year for maintainence etc, but orders that we can fulfill will be send out weekly. All custom work taken during this time will be completed as a priority in February.
Faced with huge rises in our raw material and energy costs, as well as workshop rental and transport fees, we will be increasing all prices across the board by 10% from 3rd January . This is our first price rise in nearly 5 years.
January 2022
A New Year and a new finish! We are introducing the choice of clear anodised finish across our aluminium products. You can now match to your bike’s colour and styling with our standard range crank shorteners and swing cranks. Clear anodised ER (extended range) products will be added later in 2022.
Patrick Mcloughlin, Director
February 2021
Lockdown part 3 has had quite a strong effect on our stock levels and with our supply chain. We’ve also had to endure cases of enforced self-isolation. As a result, we are experiencing some delays in fulfulling orders. If you have any very urgent requirements please send us a message via the ‘contact us’ page.
Thank you for your patience and stay safe,
Patrick Mcloughlin, Director
January 2020 – Great news – we have secured a major investment, allowing purchase of new machinery and a new workshop. We will soon be able to carry much larger stocks, speeding up delivery times.
To allow us time to set up in the new premises, we will be closed for three weeks from 13 January 2020. Any orders received during this time will be sent out (subject to stock) as soon as possible after the 4th February, first come first served. Thank you for your continued support and your patience.
We’re excited by the prospects for new products as we switch to the new machinery – watch this space!
March 2019 – Here’s a video of the Swing Crank on our demo bike …. https://www.facebook.com/highpatheng/videos/429149144520984/